How to Brew Potions in Minecraft 2026 - All Recipes & Brewing Guide
Potions rewrite what you can survive in Minecraft, yet plenty of players never brew potions at all. Brewing needs one Nether trip and about ten minutes of setup. That's it. Below: the brewing stand, the Awkward Potion base, every recipe in the game, splash and lingering variants, and which potions actually deserve your ingredients.
Why Brew Potions?
Potions give you temporary status effects that flat-out change what you can survive. A single Fire Resistance potion makes lava harmless. Strength II roughly doubles your melee output in a boss fight. Water Breathing turns an ocean monument raid from a nightmare into a shopping trip. Once you have a basic brewing setup, most potions cost almost nothing to produce.
- Fire Resistance: Complete immunity to fire and lava damage. Essential for the Nether
- Strength: A large melee damage boost for fights against the Wither, raids, or PvP
- Healing: Instant health restoration when food regeneration is too slow
- Night Vision: See in total darkness while caving or exploring ancient cities
- Slow Falling: Land safely from any height. A lifesaver in the End and with elytra
- Water Breathing: Stay underwater for minutes at a time
What You Need Before You Start
Brewing requires a trip to the Nether — there is no way around it. The two critical ingredients, blaze rods and nether wart, both come from Nether fortresses. Here is your full shopping list:
- Blaze Rods: Dropped by blazes, which spawn in Nether fortresses. Bring at least 3-4: one for the brewing stand itself and the rest to craft into blaze powder for fuel and Strength potions
- Nether Wart: Found growing on soul sand in Nether fortresses and inside bastion remnants. Grab the soul sand too so you can farm nether wart at home
- Cobblestone: 3 blocks for the brewing stand (blackstone or cobbled deepslate also work)
- Glass Bottles: Craft 3 glass in a V shape to get 3 bottles. Smelt sand for glass
- Water Source: Any water source block or a filled cauldron to fill your bottles
- Effect Ingredients: Sugar, magma cream, golden carrots, and so on (covered in the recipe table below)
Fighting blazes: Blazes shoot fireballs and set you on fire, which is exactly the problem potions solve — but you don't have potions yet. Bring a shield, a bow, and fire protection armor if you have it. Snowballs also damage blazes if you're desperate. Once you've brewed your first Fire Resistance potions, return trips to the Nether become trivial. If you're heading there anyway, our How to Find Netherite guide explains why Fire Resistance is considered mandatory for ancient debris mining.
How to Make a Brewing Stand
The brewing stand recipe is simple once you have a blaze rod:
- Kill blazes in a Nether fortress until you have at least one blaze rod (each blaze has a 50% chance to drop one; Looting increases the odds)
- Open a crafting table
- Place 1 blaze rod in the center slot
- Place 3 cobblestone in the row beneath it (blackstone or cobbled deepslate work as substitutes)
- Collect your brewing stand and place it somewhere convenient, ideally next to a water source and a chest for ingredients
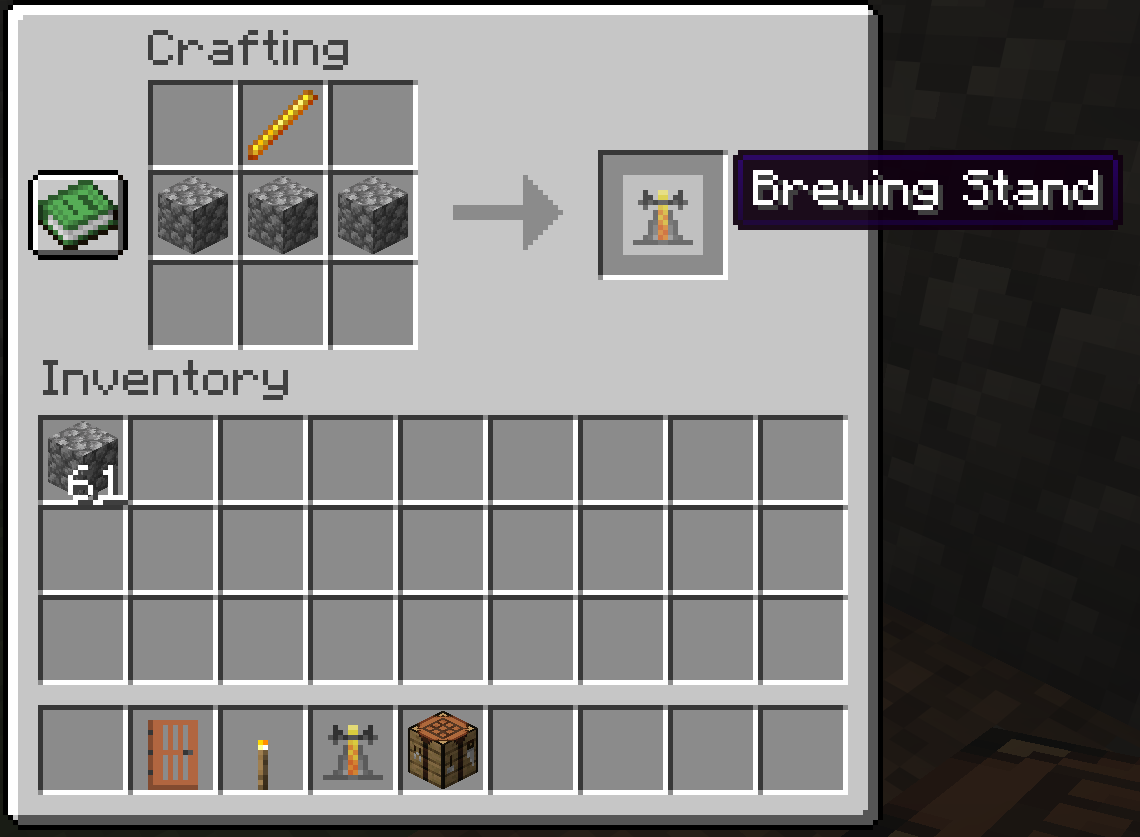
You can also find ready-made brewing stands in village churches and in End ships, but crafting one is usually faster than searching for one.
Understanding the Brewing Stand Interface
Open the brewing stand and you'll see four important slots:
- Three bottle slots (bottom): Hold up to 3 bottles. Every brew applies to all bottles at once, so always brew in batches of 3. One ingredient covers all three bottles
- Ingredient slot (top): Where you place nether wart, effect ingredients, and modifiers
- Fuel slot (left): Takes blaze powder only. One blaze powder powers 20 brewing operations
- Progress arrow: Each brewing operation takes 20 seconds
Fuel first: Craft blaze powder by placing a blaze rod in the crafting grid (1 rod = 2 powder). Nothing brews until there's powder in the fuel slot. Since one powder covers 20 operations, a couple of rods will last you ages.
Brewing Basics: The Awkward Potion
Nearly every potion in the game starts from the same base, and this is the step that confuses new brewers the most. You cannot add sugar or magma cream to a plain water bottle — it won't do anything useful. You need an Awkward Potion first.
- Fill 3 glass bottles with water from a water source block or a cauldron
- Place all 3 water bottles in the bottom slots of the brewing stand
- Add blaze powder to the fuel slot if you haven't already
- Place 1 nether wart in the ingredient slot
- Wait 20 seconds and collect 3 Awkward Potions
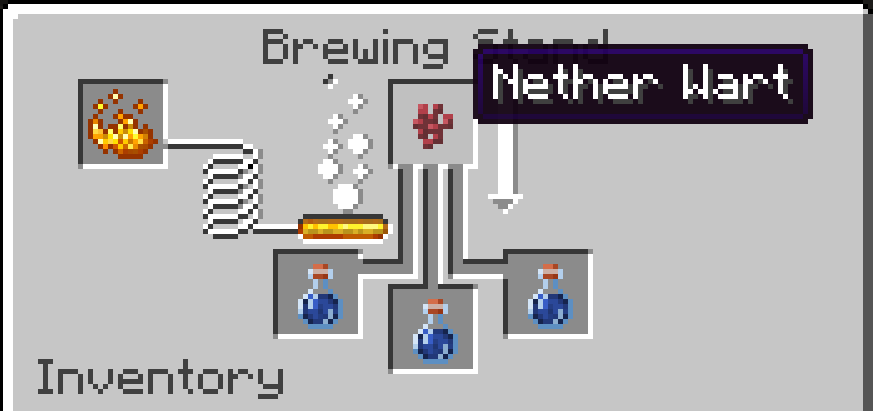
The Awkward Potion does nothing on its own. The next ingredient decides what it becomes. The only notable potion that skips nether wart entirely is the Potion of Weakness, covered in the Fermented Spider Eye section below.
Farm your nether wart: Nether wart only grows on soul sand, but it grows in any dimension and at any light level. Bring soul sand back from the Nether, plant a few wart, and you'll never need to raid a fortress for it again. No water, no light. Just soul sand and time.
All Potion Recipes: The Complete Table
Every recipe below follows the same process: brew an Awkward Potion, then add the listed ingredient. The last two columns show what happens when you afterwards add redstone dust (longer duration) or glowstone dust (stronger effect). A dash means that modifier doesn't apply to that potion. These recipes are identical across every modern version of the game.
| Ingredient | Potion | Effect | With Redstone | With Glowstone |
|---|---|---|---|---|
| Sugar | Potion of Swiftness | +20% movement speed for 3:00 | Extended to 8:00 | Swiftness II (+40% speed) for 1:30 |
| Rabbit's Foot | Potion of Leaping | Higher jumps for 3:00 | Extended to 8:00 | Leaping II for 1:30 |
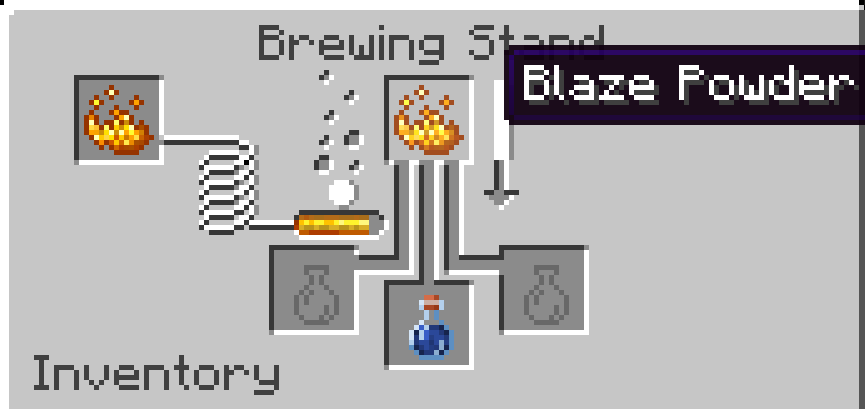
| Blaze Powder | Potion of Strength | Increased melee damage for 3:00 | Extended to 8:00 | Strength II for 1:30 |
| Magma Cream | Potion of Fire Resistance | Immunity to fire and lava for 3:00 | Extended to 8:00 | — |
| Ghast Tear | Potion of Regeneration | Regenerate health for 0:45 | Extended to 1:30 | Regeneration II (faster) for 0:22 |
| Glistering Melon Slice | Potion of Healing | Instantly restores health | — | Healing II (restores more) |
| Spider Eye | Potion of Poison | Poison damage over 0:45 | Extended to 1:30 | Poison II (faster damage) for 0:21 |
| Golden Carrot | Potion of Night Vision | See in the dark for 3:00 | Extended to 8:00 | — |
| Pufferfish | Potion of Water Breathing | Breathe underwater for 3:00 | Extended to 8:00 | — |
| Turtle Shell | Potion of the Turtle Master | Slowness IV + Resistance III for 0:20 | Extended to 0:40 | Turtle Master II (stronger, still 0:20) |
| Phantom Membrane | Potion of Slow Falling | Fall slowly, no fall damage, for 1:30 | Extended to 4:00 | — |
A few ingredient notes worth knowing:
- Glistering melon slice: Craft with 1 melon slice surrounded by 8 gold nuggets
- Magma cream: Dropped by magma cubes in the Nether, or crafted from 1 blaze powder + 1 slimeball
- Golden carrot: Craft with 1 carrot surrounded by 8 gold nuggets
- Rabbit's foot: A rare drop from rabbits. Looting helps a lot
- Phantom membrane: Dropped by phantoms, which spawn when you haven't slept for several in-game days
- Ghast tear: Dropped by ghasts; shoot them down over land or their tears fall into lava
- Turtle shell: Craft from 5 scutes, which baby turtles drop when they grow up
Modifiers: Redstone, Glowstone, and More
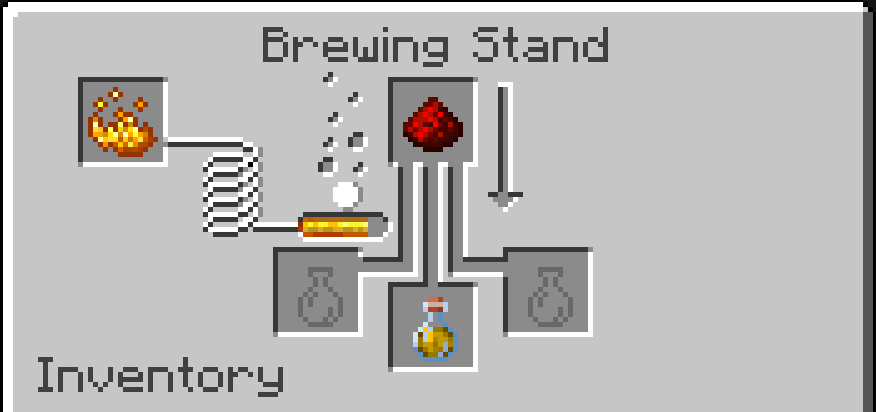
Once you've brewed a finished potion, you can put it back in the brewing stand and modify it. There are four modifiers, each with a completely different job.
Redstone Dust - Longer Duration
Brewing redstone dust into a potion extends its duration, typically from 3:00 to 8:00. For utility potions it's the best value modifier there is. An 8-minute Fire Resistance covers an entire Nether mining session, and 8-minute Night Vision covers a full caving trip.
Glowstone Dust - Stronger Effect
Glowstone dust amplifies the potion to level II (Strength II, Swiftness II, Healing II, and so on) but shortens the duration on timed effects, usually from 3:00 down to 1:30. Use glowstone for combat potions where raw power matters more than duration.
Important: Duration and potency are mutually exclusive on the same bottle. Adding redstone to a level II potion downgrades it back to an extended level I, and adding glowstone to an extended potion converts it to a short level II. You can never have an extended Strength II. Pick one or the other.
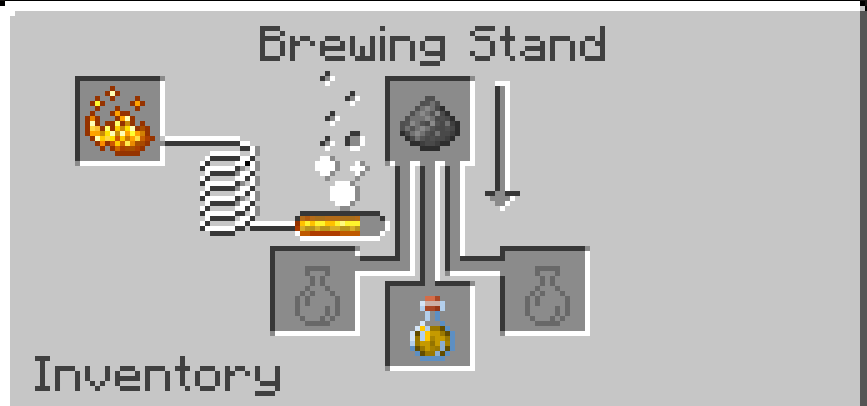
Gunpowder - Splash Potions
Brewing gunpowder into any potion turns it into a splash potion, which you throw instead of drink. Splash potions affect every player and mob in the impact area, which makes them the only way to apply effects to other entities. Throw splash Healing at a fighting friend, splash Harming at a group of zombies (undead mobs take damage from Healing and are healed by Harming, so pick correctly), or splash Weakness at a zombie villager you want to cure.
Dragon's Breath - Lingering Potions
Brewing dragon's breath into a splash potion creates a lingering potion, which leaves a cloud of the effect on the ground for several seconds. Anyone who walks through the cloud gets the effect. Dragon's breath is collected by right-clicking a glass bottle inside the ender dragon's breath attack clouds during the dragon fight. It's one of the few reasons to fight the dragon more than once. Lingering potions are also the crafting ingredient for tipped arrows, covered below.
Fermented Spider Eye: Corrupted Potions
The fermented spider eye is a special ingredient that doesn't add an effect. Instead it corrupts an existing potion into a different, usually opposite, effect. Craft it with 1 spider eye + 1 sugar + 1 brown mushroom anywhere in the crafting grid.
Here is every corruption in the game:
- Potion of Swiftness → Potion of Slowness
- Potion of Leaping → Potion of Slowness
- Potion of Healing → Potion of Harming (instant damage)
- Potion of Poison → Potion of Harming
- Potion of Night Vision → Potion of Invisibility
- Water Bottle → Potion of Weakness (reduces melee damage)
Two of these matter more than the rest.
Invisibility is the sneaky one, and the only way to get it is corrupting Night Vision. Mobs can still see your armor and held items, so strip down for full stealth. On multiplayer servers, invisibility is a classic tool for scouting and pranks.
Weakness is unique: it's the only potion brewed directly from a water bottle, with no nether wart or Awkward Potion needed. Just brew a fermented spider eye into water bottles. Its most important use is curing zombie villagers. Throw a splash Potion of Weakness at a zombie villager, then feed it a golden apple, and after a few minutes it converts into a normal villager. Cured villagers give permanent trade discounts, so the potion pays for itself many times over.
Harming is the one you'll throw at things. Brew it as a splash potion and it deals heavy instant damage to players and most mobs. Remember the undead rule: zombies, skeletons, and other undead mobs are healed by Harming and hurt by splash Healing, so carry both.
Splash Potions, Lingering Potions, and Tipped Arrows
To recap the full upgrade chain for throwable potions:
- Brew any finished potion (for example, Potion of Poison)
- Add gunpowder → Splash Potion of Poison (throwable, area effect)
- Add dragon's breath → Lingering Potion of Poison (leaves an effect cloud on the ground)
- Craft tipped arrows: place 8 arrows around 1 lingering potion in a crafting grid → 8 tipped arrows that apply the effect on hit
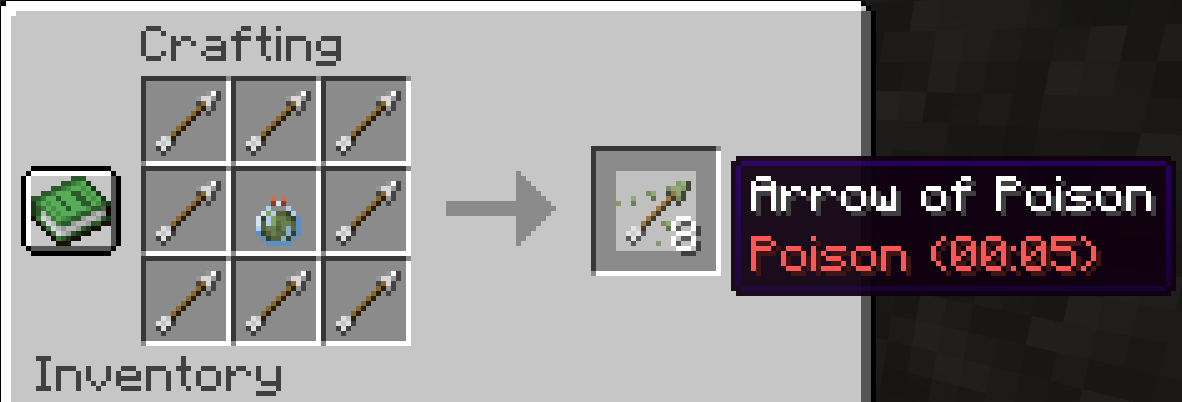
Arrows of Harming and Arrows of Slowness are excellent against dangerous mobs, and Arrows of Poison are a staple in PvP. One lingering potion makes 8 arrows, so a single dragon's breath bottle stretches surprisingly far.
Apply modifiers before gunpowder: Add your redstone or glowstone first, then convert to splash or lingering. The effect level and duration carry through the conversion (lingering clouds and tipped arrows apply shortened durations, but the level is preserved).
The Most Useful Potions for Survival, Ranked
You can't brew everything at once, so here's where your ingredients are best spent, in rough priority order for a survival playthrough:
- Fire Resistance. Negates ALL fire and lava damage. This is the single most valuable potion in the game: it makes Nether exploration, blaze farming, and ancient debris mining nearly risk-free. Always brew it extended (8:00) with redstone. If you're gearing up for netherite, read our netherite mining guide: bed mining at Y-15 without Fire Resistance is how most players lose their gear
- Slow Falling. Removes fall damage entirely. Essential for the ender dragon fight (the dragon launches you), rough elytra landings, and cliff exploration. Extended (4:00) is the way to go
- Strength II. A large flat melee damage boost. Brew with glowstone for boss fights, raids, and PvP. The extra damage per hit shortens every fight
- Healing II. Instant health, no waiting. Keep a few in your hotbar as a panic button; splash versions can heal your whole team at once
- Night Vision. Extended Night Vision makes caving, ancient city raids, and underwater exploration far more comfortable than torch-spam. Bring Water Breathing too
- Water Breathing. Mandatory for ocean monument raids and very handy for finding underwater ruins and shipwrecks
- Regeneration. Sustained healing during long fights. Weaker per-second than Healing is per-use, but great insurance before wading into a raid
- Swiftness II. Travel and escape. Cheap to brew (sugar is everywhere) and stacks well with sprinting
Turtle Master deserves an honorable mention for niche situations: Slowness IV is a real cost, but Resistance III makes you extremely hard to kill for its short duration. Useful when tanking hits is the whole plan.
Common Brewing Mistakes to Avoid
- Skipping nether wart: Adding effect ingredients to plain water bottles doesn't produce useful potions (fermented spider eye's Weakness is the one exception). Always brew Awkward Potions first
- Brewing one bottle at a time: Three bottles cost the same ingredient as one. Fill all three bottom slots
- Forgetting fuel: The stand does nothing without blaze powder in the fuel slot. One powder lasts 20 operations, so this is cheap. Just don't forget it
- Stacking redstone and glowstone: They overwrite each other; pick one before you brew
- Throwing Harming at undead mobs: Zombies, skeletons, drowned, and other undead are healed by Harming. Use splash Healing against them instead
- Wasting dragon's breath: Only convert to lingering potions when you actually need effect clouds or tipped arrows; splash potions cover most situations
- Not farming ingredients: Set up a nether wart farm on soul sand and a sugar cane farm early. You can't buy your way out of a shortage in survival
One more note on expectations: there is no craftable Potion of Luck in survival, and the Potion of Decay is a Bedrock Edition exclusive — you cannot brew wither-effect potions in Java survival. If a recipe isn't in the table above or the corruption list, it doesn't exist in the game.
Frequently Asked Questions
How do you make a brewing stand in Minecraft?
Craft a brewing stand with 1 blaze rod + 3 cobblestone (blackstone or cobbled deepslate also work): blaze rod in the center of the crafting grid, three stone blocks in the row beneath it. Blaze rods drop from blazes, which spawn in Nether fortresses, so you'll need to visit the Nether before you can brew.
What is the base potion for all recipes?
The Awkward Potion is the base for almost every potion in the game. Brew it by adding nether wart to water bottles in a brewing stand. Nether wart grows on soul sand and is found in Nether fortresses and bastion remnants. The only exception is the Potion of Weakness, which is brewed directly from a water bottle with a fermented spider eye.
What fuel does a brewing stand use?
Brewing stands run exclusively on blaze powder, crafted from blaze rods (1 rod = 2 powder). One blaze powder fuels 20 brewing operations, and each operation takes 20 seconds and brews up to 3 bottles at once. Coal, wood, and other furnace fuels do not work in a brewing stand.
How do you make a splash potion?
Brew gunpowder into any finished potion to convert it into a splash potion, which you throw instead of drink. Splash potions apply their effect to every player and mob in the impact area. Add redstone or glowstone modifiers before the gunpowder; the extended duration or amplified level survives the conversion.
What is the difference between redstone and glowstone in brewing?
Redstone dust makes a potion last longer, typically turning a 3:00 effect into an 8:00 one. Glowstone dust raises the effect to level II at the cost of duration. A bottle only holds one of these upgrades, and whichever you add last wins, so an extended level II potion is impossible. Reach for redstone on utility brews and glowstone on combat brews.
How do you cure a zombie villager with potions?
Throw a splash Potion of Weakness at the zombie villager, then feed it a golden apple. After a few minutes of shaking, it converts into a normal villager with permanent trade discounts. Brew Weakness by adding a fermented spider eye (spider eye + sugar + brown mushroom) directly to water bottles (no nether wart needed), then add gunpowder to make it throwable.
How do you make tipped arrows?
Place 8 arrows around 1 lingering potion in a crafting grid to get 8 tipped arrows with that potion's effect. Lingering potions are made by brewing dragon's breath into a splash potion. Dragon's breath is collected by using glass bottles on the ender dragon's breath attack clouds during the dragon fight.
Conclusion
Brewing looks intimidating from the outside, but it boils down to one repeatable pattern: water bottles + nether wart = Awkward Potion, Awkward Potion + effect ingredient = potion, potion + modifier = better potion. Master that loop and the entire potion system opens up. Start with Fire Resistance for the Nether, add Slow Falling and Strength as you gear up for bigger fights, and keep a nether wart farm running so you never run dry. And if you're still working toward the diamond gear you'll want for those Nether trips, our How to Find Diamonds guide will get you there.
Quick Summary:
- Get blaze rods and nether wart from a Nether fortress
- Craft a brewing stand: 1 blaze rod + 3 cobblestone
- Craft blaze powder for fuel (1 powder = 20 brews) and glass bottles (3 glass each batch)
- Fill 3 bottles with water and brew nether wart into them for Awkward Potions
- Add an effect ingredient (sugar, magma cream, golden carrot, and so on) from the recipe table
- Add redstone for duration or glowstone for a level II effect (never both)
- Optionally add gunpowder for splash potions, then dragon's breath for lingering potions and tipped arrows